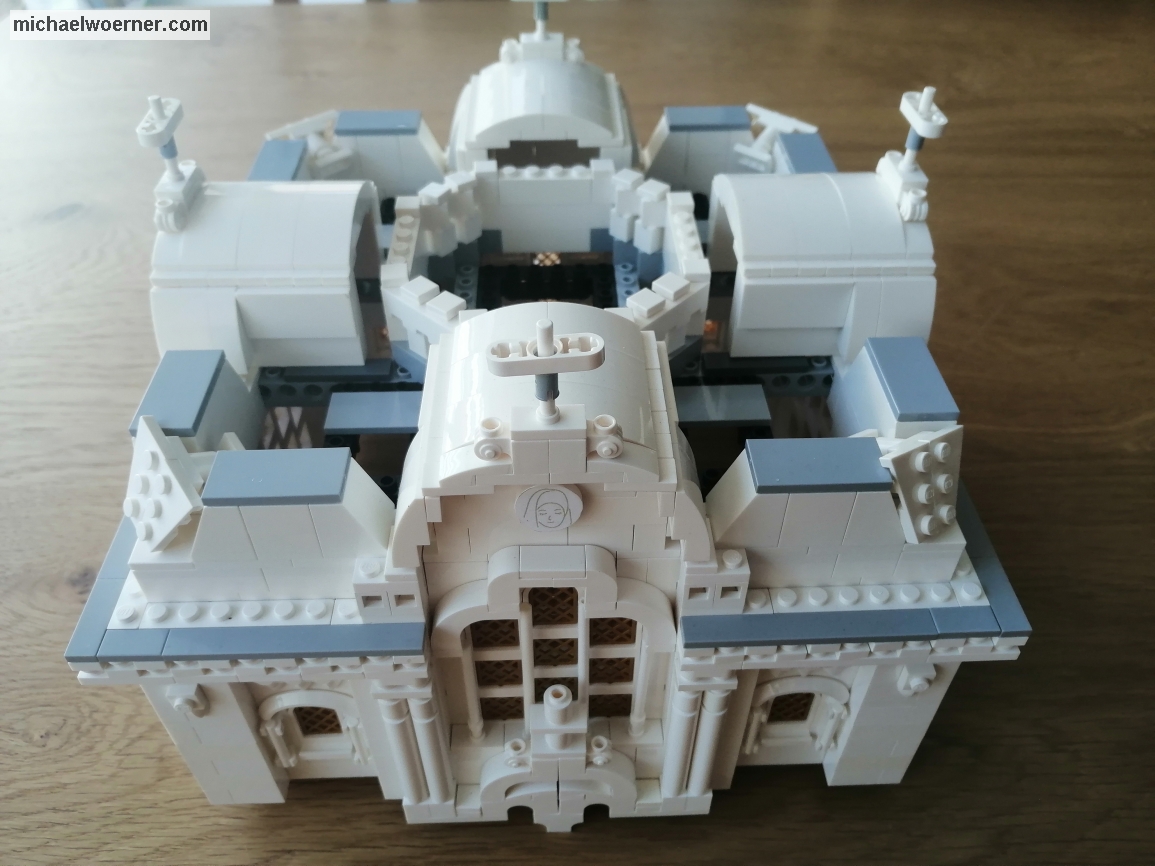
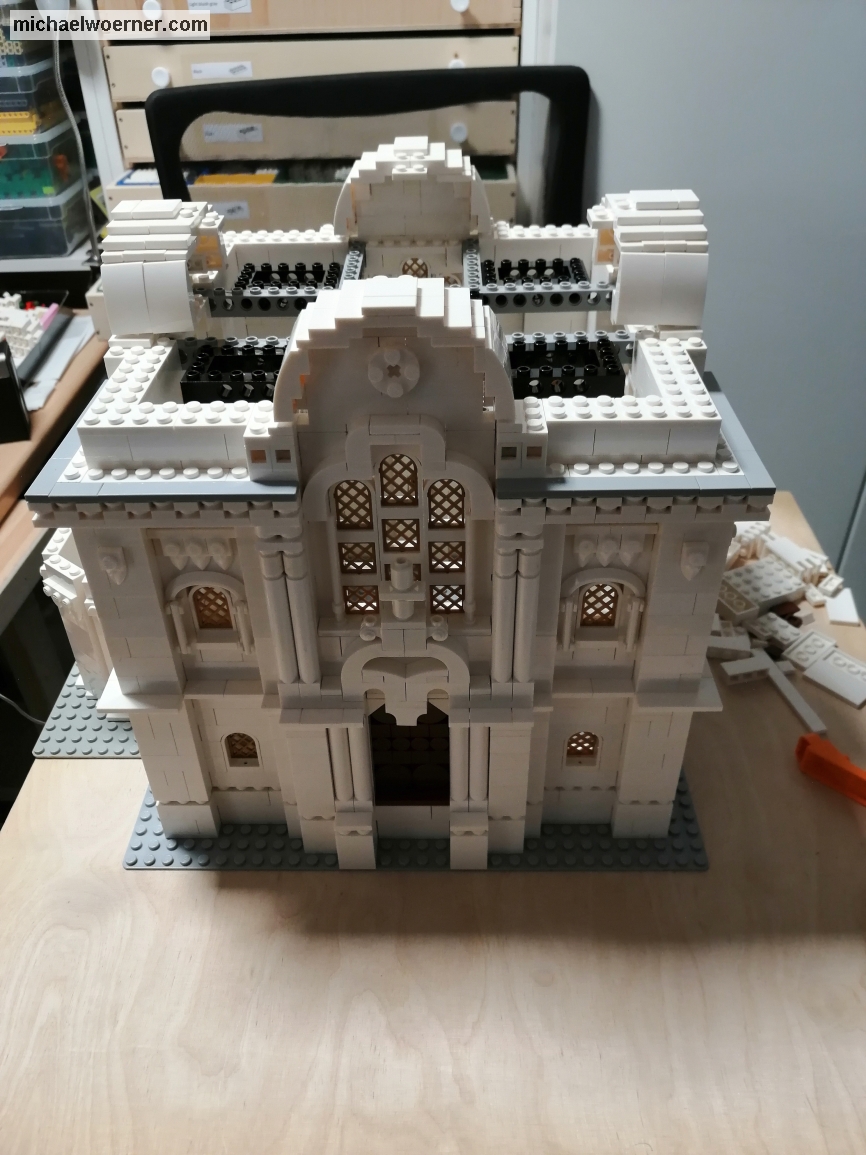
Now that the second floor is almost finished, I have to think about how to build the transition to the next area in this fourth part. There, barrel roofs are installed above the middle windows. The corners spring back a little and taper towards the top and centrally there is a tower.
I start with the barrel roofs and had thought about using the arches 1x6x3 1/3 (6060) to implement them. Unfortunately, the roofs would then be too wide with 12 pins. So I need another solution and had created a narrower roof using the SNOT technique (SNOT = Studs Not On Top) which fits just fine. For this I use curved slopes (24309 + 50950) for the sides and tiles on top, connected to the sides by bricks with pins on the side (87087). I rebuilt this roof shape later and also used the curved slopes at the top, because it came even closer to the real shape.
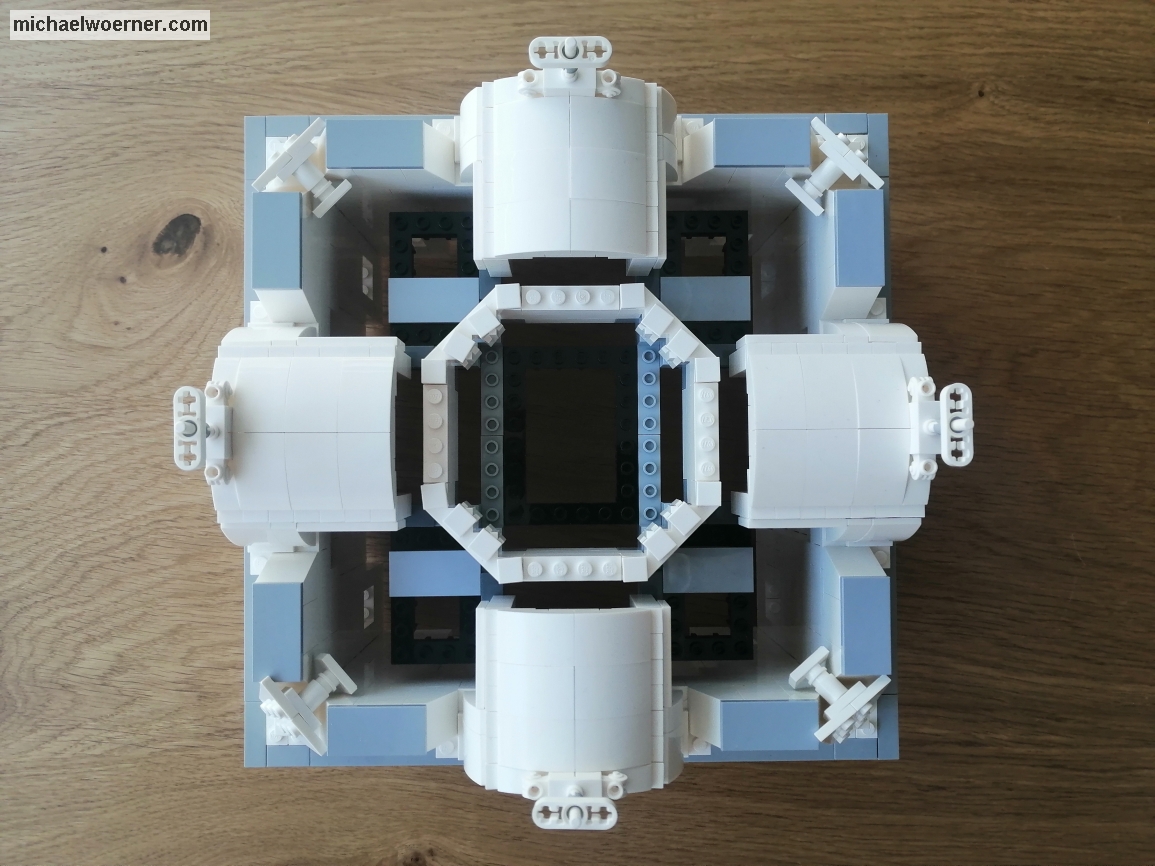
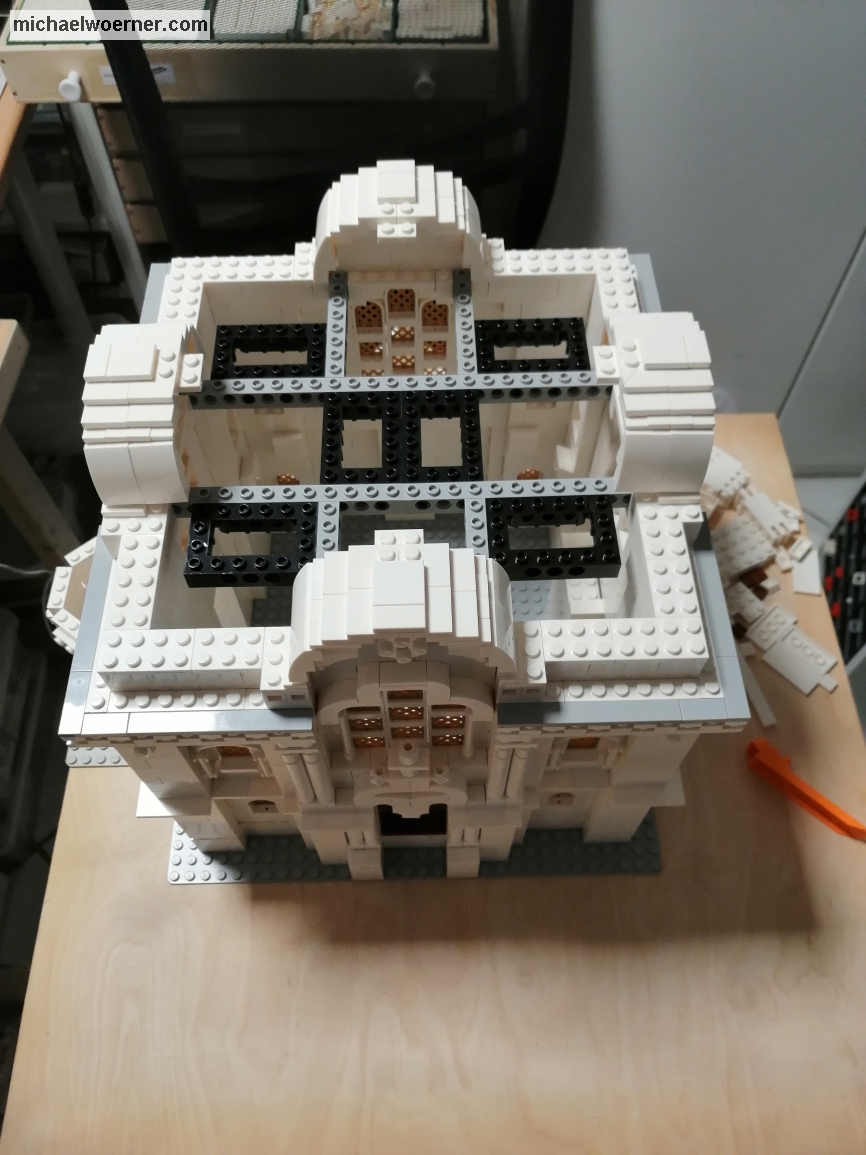
Since I haven’t built any columns in the building that can hold the tower, I need to come up with a design that is capable of holding this structure. It was clear that technic bricks must be used here. Only these are stable and narrow enough to bridge the distance between the outer walls. To build an intersection, in my case the best way is to use the square technic bricks. I use the 40344 because that’s what I have on hand. I figured with technic pins the elements would connect tightly enough to support the tower load. Later it turned out that the weight of the tower was so high that the structure underneath was sagging a bit. Therefore I built a column of two 2×4 bricks in cross bond underneath.
As mentioned above, the corners in the next level jump back a little and taper with the height a little. The vertical outside corner is also beveled and not an easy task to implement. The most suitable are bevelled plates. Unfortunately, this is not available as a tile. That would look best. I had the shape with 2 of these 2×3 wedge plates (43 222 + 43 723) and it fit well into the gap, but the fixing was not possible in normal way. I had no choice but to clamp. Not very stable, but enough for a stationary model.
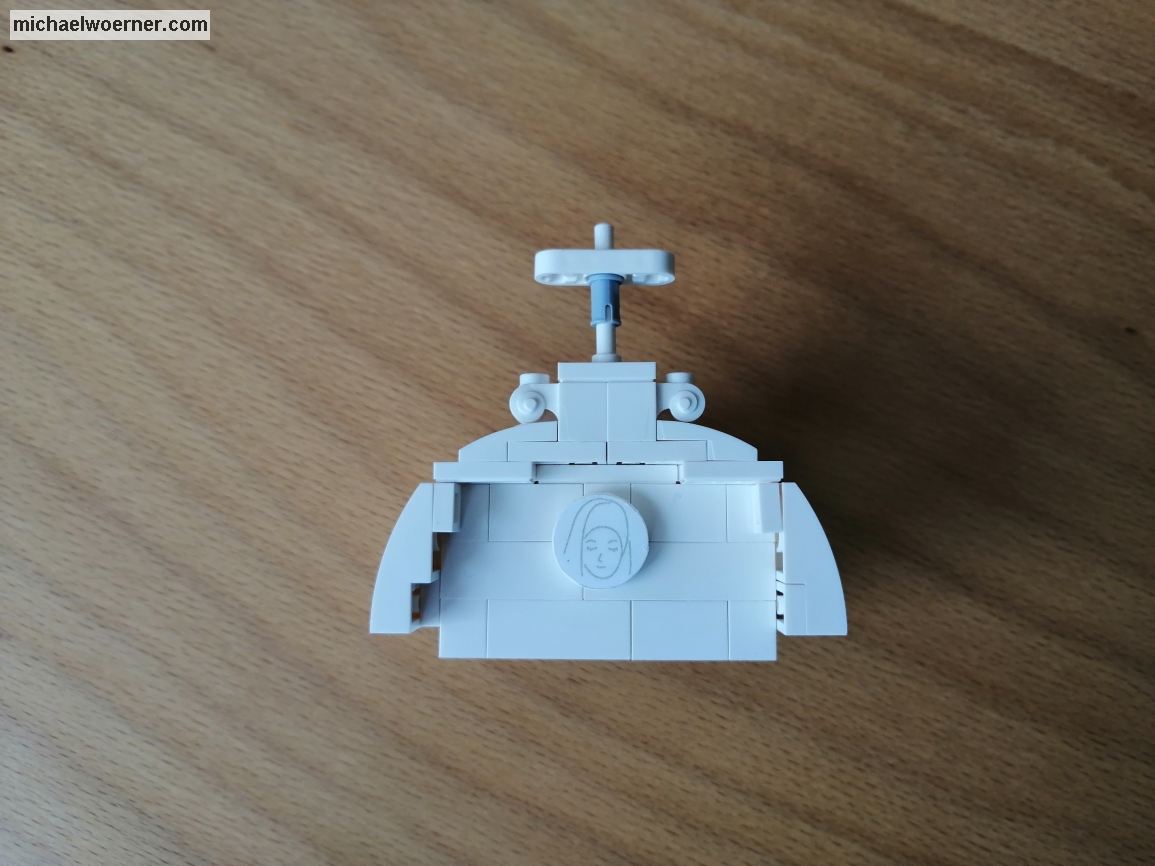
The last step for today is the tower base, it was easy to build. With bricks Facet 4×4 (14413) the substructure was quickly completed.
With these pictures I end today’s report. I think by now you’ve guessed what this is going to be. Write me your solution in the comments.
Until next time.