Now is the time. As announced, the second Part of the construction of the model.
Let’s start with the ‘what’. I don’t want to give too much away yet. It’s not difficult either and you’ll figure out what it’s going to be pretty quickly. But this much in advance: it will be a building that really exists.
I chose a 32×32 pin baseplate as my measurement. In the run-up I made many photos of the object and informed myself about the real dimensions, searched in the internet resp. determined from photographs. One edge length has about 17 meters. The building has a square footprint, which makes it quite easy to get the model onto a 32 baseplate. Each Lego® brick has a width of 8mm per pin, so a 32 baseplate is 32 x 0,8cm = 25,6cm wide/long.
Scale = 1 : scale number
Scale number = true size : model size
For me, this means that I have a scale of 1:70 at 17,5m side length. Thus 70cm in real complies 1cm model. You can work with that. Now I take a picture where the building is completely visible from the side and I separate it into the distinctive areas, bounded by corners, projections, windows and stairs. I measure the distances and put them in relation to my available width. It almost never fits precisely because of the 8mm grid. But a little adaptation and consideration (how wide is a finished window?) then give me the solution. I decided to use finished window elements and not build them myself out of parts. The scale allows this and reduces the complexity and the total number of parts and thus the price.
For ease of understanding, I have given numbers in brackets after the parts described. These are the design numbers of Lego.
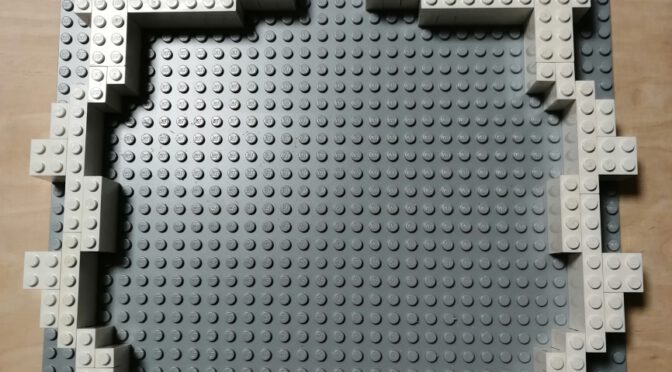
I have a bird’s eye view picture with another from the side, and I’m using those to lay the first layers of bricks. The rounding on the back is a little tricky and it took me some tries to get it to work that way. The angles do not allow the bricks to be fixed to the base plate, the hinges give a lot of movement. To counteract this, I used angles (99207 + 32952) with tiles on the base plate to keep the distance to the wall as small as possible and the curve evenly in shape. I use 2 different hinges for the rounding. One as a stone (3830c01), the other as a plate (2429c01). A comparison with the picture from the side shows me that this could fit. I’ll keep building, if it doesn’t fit later I can change it. I love plug-in systems 😉
That’s it for today. Until the next part, then with more pictures
